How to change nameservers from Truehost Cloud Client area
When you register a domain name from Truehost, the domain will be assigned Truehost nameservers by default.
The domain name settings (DNS) allows you to point your domain name to different provider e.g. web hosting server, email servers, Content Delivery Networks (CDNs), DNS Management systems, Dedicated servers, Local host, etc.
In this article, we are going to see how you can easily change your domain name servers from Truehost’s new Client area very easily.
Truehost Nameservers
The default nameservers are as follows:
ns1.cloudoon.com
ns2.cloudoon.com
ns3.cloudoon.com
Alternatively, you can use the nameservers below:
ns1.cloudoon.com
ns2.cloudoon.net
ns3.cloudoon.org
Whether you are using the first or second set, both will resolve to Truehost Shared Hosting.
How to Add Your Own Custom Nameservers in Truehost Client Area
In case you are hosting your domain elsewhere, then it is advisable that you change your nameservers to point to where you would like to be hosted. Here are the steps on how to achieve this from your Truehost Cloud Client area.
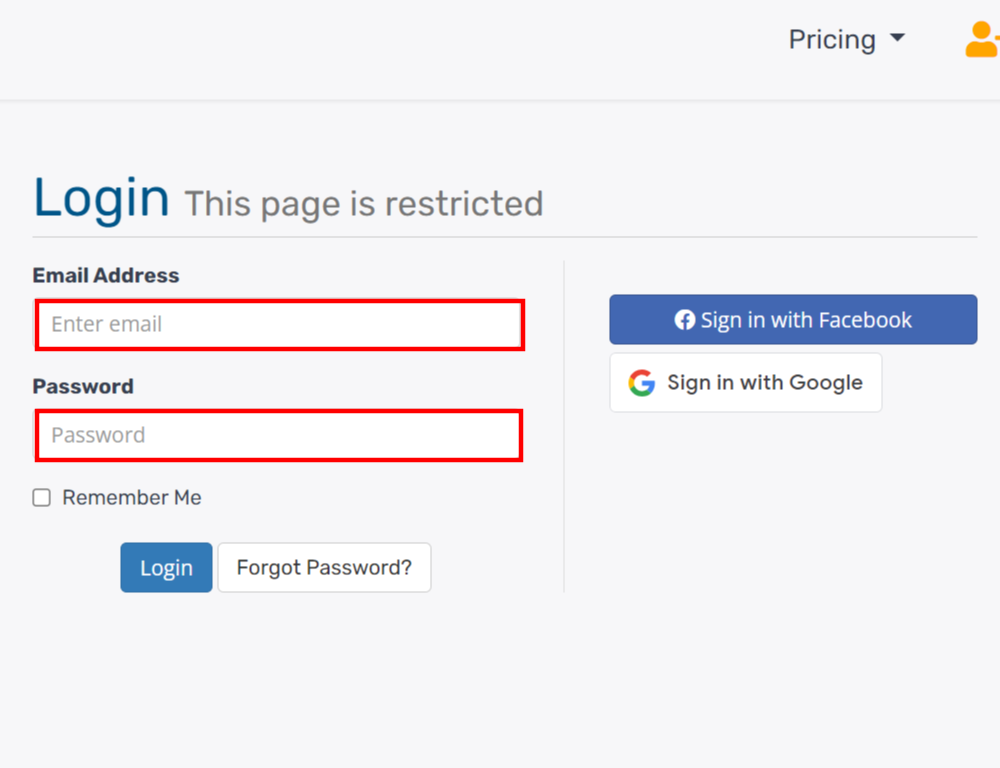
Step 1: Login to Your Truehost Account
Access the truehost login page.
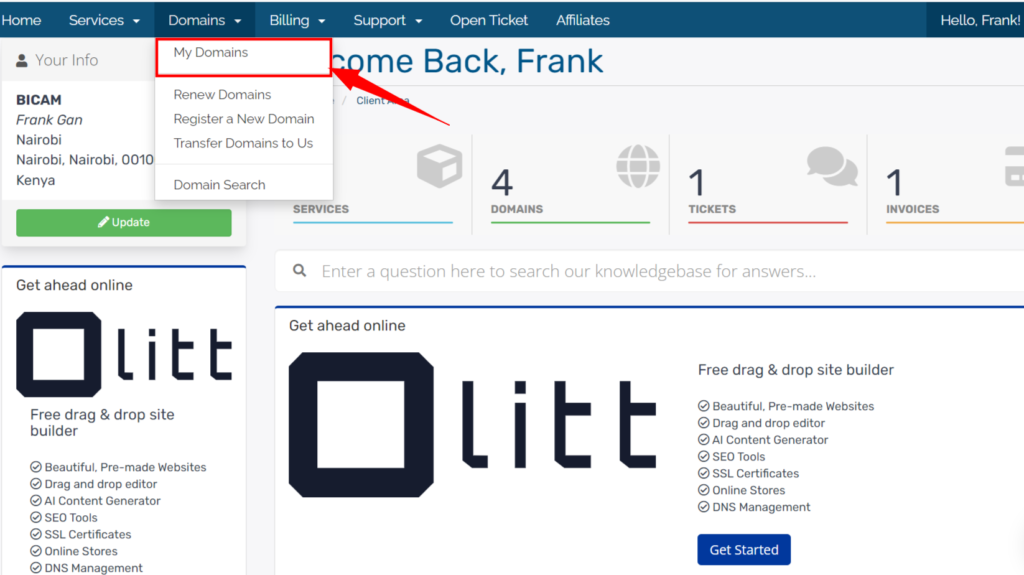
Step 2: From your Client Area, Access ‘My Domains’ under Domain Section
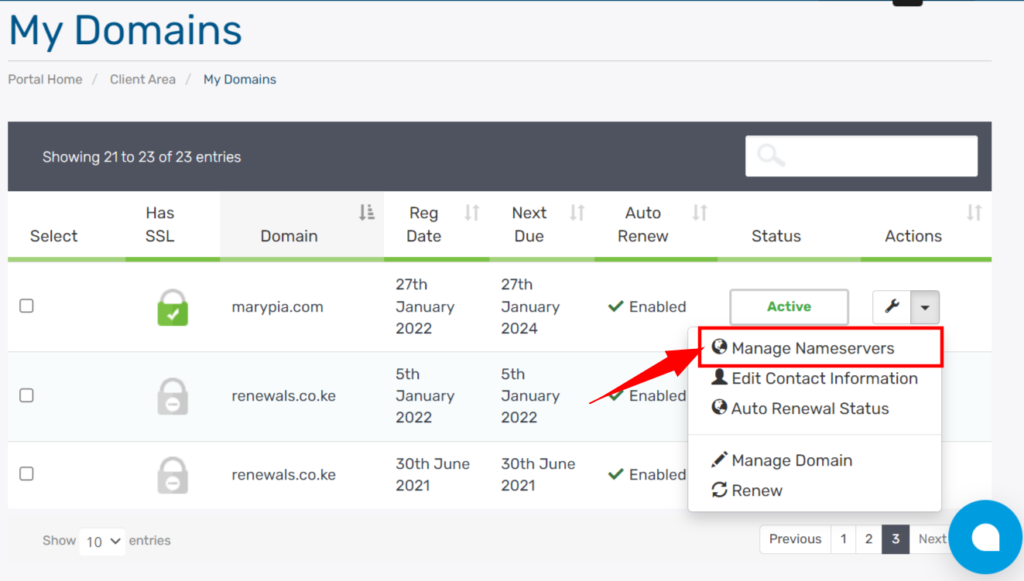
Step 3: Click Manage Nameservers
Choose to Manage nameservers from the drop-down menu conveniently placed at the right of the active domain to which you would like to change the nameservers.
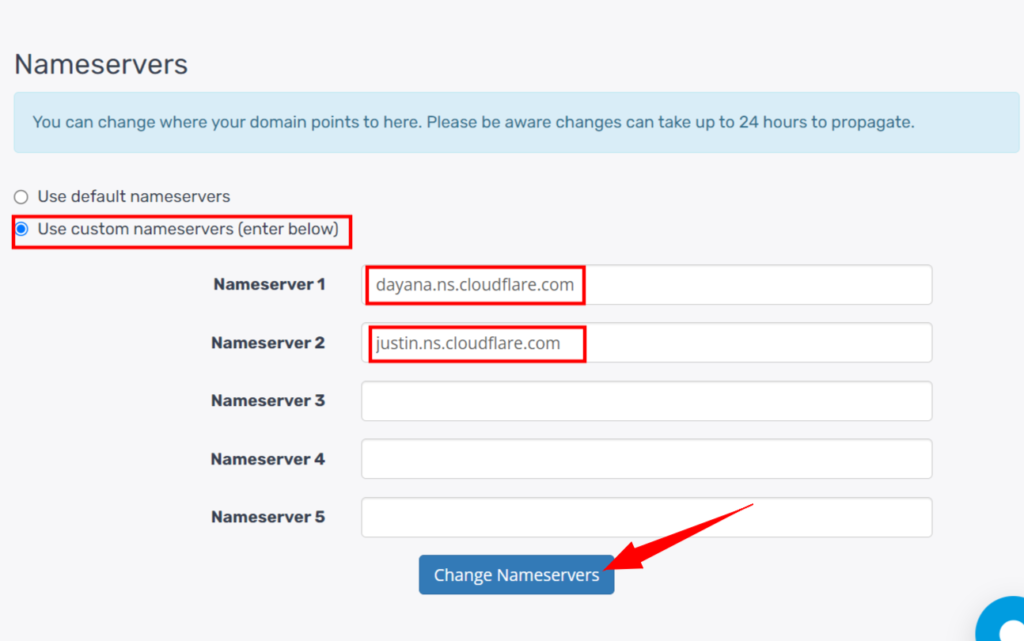
Step 4: Add Custom Domain Names
Choose the option for custom nameservers and then add your custom nameservers in the fields provided.
Replace the Truehost Nameservers with your customer nameservers.
Make sure to save the changes by clicking the Change Nameservers button below.
Congratulations!
You have changed your nameserver to a different provider.
Take note that the nameservers can take up to 24 hours to propagate.


